Image 01

Lady Violette

The Romantic Lifestyle

Posts Tagged ‘Textiles’

Lady Violette’s Sewing Studio ~ in the Corner of the Kitchen! Where I Cook Up Gowns for Real Princesses!

Saturday, April 16th, 2011

Lady Violette's Kitchen Corner Sewing Studio ~ Where Gowns are Made for Real Princesses!

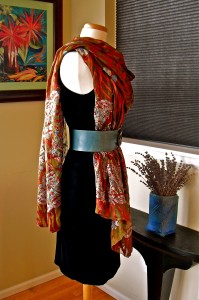
This morning I was taking final photographs of the dresses I have designed for Princess Wow! before I send them to her in New York. Between taking pictures of the right side of this dress and shooting details of the wrong side, or inside, I snapped this photo of my tiny sewing area in the corner of our kitchen! It is a very tiny area and I rather like it! This picture reminds me of something from Victoria Magazine when it first came out years ago and was full of lovely photography of interiors, artist’s work spaces and romantic settings!

In this tiny space I have taken all the photos on my blog, done all the sewing and knitting I have shown, styled and photographed all of my recent scarf and shawl tying and styling demonstrations, styled and shot all the vintage clothing I have shown on my blog and sold on eBay and Bonanza, made adults and children’s clothes, made dresses for princesses of all sizes, made and photographed jewelry, written things and cooked every day! I have often been doing several of these things at the same time!

We also use this same space for reading, talking, visiting with friends, having tea and watching movies! Everyone who comes by the house heads for this corner first! And usually plops down on the couch, hangs out here for a while, has a cup of tea, talks, plans what is going to transpire next and eats something. It is very conveniently located right next to the tea cupboard, the teakettle, the stove and the refrigerator! I like it when friends feel so comfortable that they walk right in, ask me what I’m cooking, grab an apple or banana from a bowl on the counter, and make themselves at home. It doesn’t disturb me or my work at all! In fact I find it forces me to relax and take a break and afterwards I am able to return to whatever project I’ve been working on and be more productive.

Even I am quite amazed at what can be done with a small space if one is resourceful. It was all I had to work with and presented an interesting challenge. The more I experiment with using it the more I find I can do within the limitations it presents. Sometimes limitations and restrictions help you make good art because you have to begin by working within their confines. This photo is another humble little example of that fact!

Share

Short Ribbed Poncho/Capelet/Shawl/Scarf – Hand Knit of Noro’s Iro Self-Striping Yarn in the Brown Color Way by Lady Violette

Friday, April 15th, 2011

Hand Knitted Ribbed Poncho of Noro's Iro Yarn in the Browns Color Way

This is a short ribbed poncho or capelet that just covers the neck, chest and shoulders. Sort of like a scarf, actually, but in a circle so it stays on. Vogue has put out a knitting pattern book with scarves, shawls and ponchos so they, too, feel they are all in the same category. The keeping warm stylishly category!

The pattern is called Cat and is in the book Naturally Noro by Jane Ellison beginning on page 44.  It is hand knit of Noro’s Iro self-striping yarn in shades of brown.

It takes 300 Grams which is 3 skeins of Iro yarn in the color of your choice and is worked on size 10.5 US needles. It is an easy pattern and is very quick to knit. The poncho is a very cozy cover for the upper body. I like wearing it to grocery shop because I get really cold  in the super cold store grocery stores! The yarn is a little scratchy so I wear a tight cotton turtle neck sweater under it.

This Poncho is knitted in one piece on straight needles and seamed together down the back.

Handcrafted Scatter Pins Made From Vintage Buttons & Seed Beads

I felt the poncho needed a little embellishment so I made three accent scatter pins to decorate the left shoulder. These are very easy to make out of  vintage buttons stacked together, then glued and attached to a metal craft brooch pin. The flower pin is made of seed beads strung on thin wire, twisted into the shape of a flower and, attached to a craft brooch pin.

Pins like this are very lightweight so they won’t stretch out and damage hand knits. They also make excellent personalized embellishments for hand knitted or felt hats.

The book, Naturally Noro, by Jane Ellison is full of cute modern knitting patterns. I have finished two scarves out of it and am working my way through a vest and a sweater now. The designs are fairly easy to make, and are casual and wearable. Maybe I will be able to knit them all! I’m trying!


Share

Lady Violette’s Hand Knitted Blue Violet Striped Cardigan Sweater

Thursday, April 14th, 2011

Lady Violette's Blue Violet Striped Top Down Circular Needle Hand Knitted Cardigan

This is the first cardigan I have ever knitted using the top down circular knitting technique. I used scrap yarns in blues and purples left over from years of projects people in my family had knitted. Thus my name for it:Lady Violette’s Blue Violet Striped Cardigan!  The yarns were in many different weights so I had to adjust the needle size to maintain the gauge throughout the project. Sometimes I knitted with one strand, sometimes 2 or 3 combined or held together, and I used sizes 6,7,and 8 US needles. There was a lot of guess work and re-knitting involved. Fortunately I’m pleased with the finished results.

Blue Violet Striped Top Down Cardy Sweater ~ Back View

The shape looks a bit odd on my mannequin, but it looks good on my body as I fill it out in the right places and I actually have shoulders and arms! Those are required to make the sweater look good. The arms look long in the photos but they actually fit me. I have measured and carefully worked to get the sleeves to be the correct length. Of course real human arms fill them out and pull them up to make them look the proper length and  shape. And a lot better! Someday I hope to get a mannequin with arms! Meanwhile this will have to do.

The Blue Violet Striped Top Down Cardy Can Also Be Worn Unbuttoned

I’m taking these photos by myself and don’t have equipment to photograph myself in the sweaters so the mannequin will have to do as my model until someone is here to photograph me modeling my sweaters.

It is better to take these photos than none! It has taken me forever to get around to photographing my finished knitting projects. I think that is because I am very concerned that I do a good job! I do not like seeing photos of knitted garments that do not do them justice.

I also would rather be knitting than photographing and posting photos of my knitting! Knitting is the most relaxing thing in the world. Photographing knits and writing about them is not as pleasant in my opinion. It requires discipline! However, now that I am blogging I want to get them up and I want to post them on the knitting website Ravelry.

I created this pattern myself as I went along. I kept notes, but I think it would be very hard to recreate the pattern and rewrite the instructions for someone else as I did  many try-ons for fitting and adjustments as I knitted along. Also, having used many old yarns which no longer had their labels and are of mysterious identity even to me, I would find it hard to write the pattern and advise people on exactly what currently available yarns to use.

If you want to make something like this I suggest you find a plain sweater pattern that you like. Then dive in! Decide what you want to use for the ribbing and front bands, start there, and add yarns when and where it looks good to you to create the stripes as you work. That is how I did it!

Blue Violet Top Down Cardy Knit on Circular Needles From a Medley of Scrap Yarns

I have also used self striping yarns such as Noro and Tonalita for other striped sweater projects. I love them because there are no ends to weave in or splice! And no gauge changes to calculate. You can safely knit them mindlessly going along and end up with excellent striping results. The yarn makers have dyed the yarn to make the stripes for you. If you want to make a striped sweater similar to this, with less work, I advise you to choose a Noro yarn in the color way of your choice and knit a plain cardy. You could use a solid color yarn of the same weight to make the ribbing and button bands if you chose to. Using a self-striping yarn for a sweater like this would be an intermediate level project. Using the varied yarns as I did is more challenging and I would rate it as an advanced level project.

I will post a brown striped cape/shawl soon to illustrate how one of the Noro Iro self striping yarn works up.

Share

How to Make (or buy) the Gigantic Scarf I Used for My “Belted Half Dress Drape” Long Oblong Scarf Style.

Wednesday, April 13th, 2011

I know how hard it is to find a giant scarf, or a great scarf! Especially one that is affordable or in the fabric, the color or the shape that I want. Therefore I have started making my own so that I can have whatever I need!

Gigantic Scarf 96" x 45"


This is the scarf I used to create the “Belted Half Dress Drape” scarf style demonstrated in my post yesterday. It is simply a 96″ long piece of 45″ wide fabric narrowly hemmed on each end. In this case with a rolled hem stitched by machine using a narrow hemmer foot. You can do it on a machine or by hand. The hand method is called a narrow rolled hem.

When selecting fabric something very light works best. This scarf is made of silk chiffon. It is border printed on each end because it was originally intended to be made into a scarf, but any all over print or a solid color will work just as well. Silk or polyester chiffon, china silk, lightweight silk crepe, rayon, or very lightweight cotton batiste would also be appropriate.

You will need to buy between 8 and 9 feet of fabric total. You want it to be sure the fabric is cut straight across the end before you hem it. Fabric stores do not always cut off the pieces they sell in exact straight lines with the grain of the fabric. Check for this before you sew the hem and, if necessary even it out.

Shops that sell Indian saris carry the kind of fabric I used. I have seen border prints, printed on each end like this one, or on just one end. My scarf is 96 inches long, That is 8 feet. I am 5″ 7″ tall and I found the length to be adequate. However, if I could I would get a little longer piece, such as 9″ that would give me a bit longer drape hanging down the back when I have finished the tie. If you are very tall I advise a 9 ‘ long scarf. That is all there is to it! It is quite easy and you can make your own “designer ” scarf in just the size, shape and fabric you need quite reasonably! Appropriate fabrics will cost from $3 per yard to about $40 per yard in fabric shops.

I have found chiffon on discount tables for $3 – $5 per yard. The sari silk scarf cut I used in the picture was a true bargain for $5 found in a thrift shop. They are also available in Indian shops and are not terribly expensive. I have also seen silk in fabric shops for $20 – $40 per yard. If you do not sew yourself, just purchase the fabric you like and take it to a tailor or dressmaker and ask them to hem it for you. Or ask the staff if anyone there would be willing to do it. I know that many women who work in fabric also sew for people.

Share

Lady Violette’s “Belted Half Dress Drape” ~ A New Scarf Style ~ How to Wrap It & Wear It & Transform a Dress!

Wednesday, April 13th, 2011

Necessity is the mother of invention. I needed to figure out something impressive and dramatic to wear to a midday meeting with a producer/ presenter. I needed to look creative and talented and be memorable. I wanted to look ultra feminine as well because I feel that works to my advantage. I wanted to look both business-like and artistic. I felt that sensual and attractive would work, but I did not want to look not overtly sexy. Although it is spring it is also still cold out and I needed to be warm. I find that wearing tights and  layering scarves and shawls over dresses traps air and creates a cozy layer of practical extra warmth. I cannot think and relax if I am cold! It has been in the 30’s all week. It has been wet and windy, even snowing and hailing. And it has been drafty everywhere, both inside and out. All these thoughts were at work in the back of my mind. And this was only what I had to be thinking about what I was going to wear! The other things on the agenda were on my mind as well, but I felt I had them under control. I just wanted to figure out something to wear in which I would feel comfortable and confident, and have my outfit and accessories all worked out in advance.

Browsing through the Nieman Marcus online catalogue for ideas yesterday I found an immense Oscar de la Renta scarf and a wide belt that I loved. Alas, the scarf was $850 and the belt was $395. I couldn’t buy that right now, but I was determined to have the look! So I sorted through my things to find my biggest scarf and a belt of similar width. They don’t give the size or the shape of the Nieman Marcus scarf, only the price! It looked big and it looked like a square.

Front View of the "Belted Half Dress Drape" Achieved ~ Transforms a Dress with Just One Wrap & a Wide Belt!

I don’t currently have a gigantic square, but I do have a brown and olive green gigantic oblong silk scarf that measures 45″ x 96″. It is basically an 8′ x 45″ wide piece of fabric, but it is printed with a blue and white floral design at both vertical ends like a border print, so it was designed to be a scarf, shawl. or stole. I also found that I had a blue leather belt about 3 inches wide.

The idea I had was to make what I have named a “Belted Half Dress Drape” using the gigantic oblong silk scarf  and securing it with the wide color co-ordinated belt. I wanted to transform my basic sheath dress into a cinch waist draped silk dress by using one simple to do wrap and belting it! I wanted the finished style to look like one of the very expensive European or American designer silk draped sheath dresses I have been seeing in fashion magazines and stores lately.

Thus I concocted my “Belted Half Dress Drape”  Scarf Style.
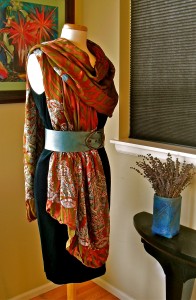
3/4 or Right Side/Front View of the "Belted Half Dress Drape"

I think it worked quite well and it was amazingly easy to do! I have taken photos from all angles so you can see that my new “Belted Half Dress Drape” scarf design actually looks nice and works as a dress from back, side and front views!

As you can see the “Belted Half Dress Drape” is beautiful from all angles.

I think wearing a scarf beautifully is one of the ultimate feminine arts!
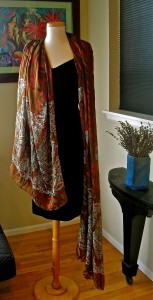
Step #1) Drape Scarf Over Shoulders, Left side Longer Than Right as Shown.


To create this sensual style all you do is:

Step #1) Drape 96″ long or longer scarf around the back of your neck and over your shoulders, Left side longer than Right as shown. Right side reaching almost to the hemline of your dress. Spread the Right side out to fan over your body from the center to the Right side seam of your dress.
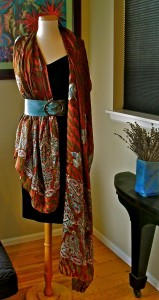
Step #2) Fasten the Belt Around Your Waist with Right Shorter Side of Scarf Underneath It & Left Longer Side Hanging Free.

Step #2) Fasten the wide belt around your waist with Right shorter side of scarf underneath it and Left longer side of scarf on the outside of belt hanging free over your Left shoulder. Arrange the folds of the scarf to your taste like a little half dress that covers the right side of your body.
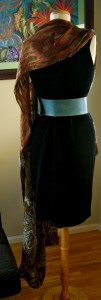
Step #3) Check the Back View in a Hand Mirror After Putting on the Belt. It Should Look Like This!

Step #3) The back will look like this! I found it helpful to look at the way things were arranged in the back in a full length mirror using a hand mirror. Be sure that only the Right front shorter side is tucked under the belt. The Left longer side should be hanging freely off to the Left side in a casual manner like this.

I experimented with the arrangement of the front folds and found that I preferred them to be uneven and arranged like a gathered skirt in the front. This was softer, prettier and more feminine than a straight across the bottom hemline. I pictured a Grecian draped effect as my goal. It may be helpful to strive for that as you arrange your folds.
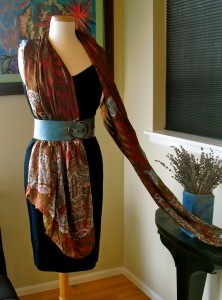
Step #4) Gather Up the Long Left Side of the Shawl and Drape it Over Your Right Shoulder!

Step #4) Finally gather up all the fabric in the long Left side of the shawl and drape it loosely and casually over your Left shoulder around your neck and over your Right shoulder letting the long drape of fabric hang down your back! You will need to arrange the drape in your own individual manner in a way that is pleasing to you.

I was able to do this on myself in about three minutes! I wore it around the house for a couple of hours and it actually stayed put and maintained the original look while I tested it out. I did not pin it in place, but you could use a brooch on the Right shoulder to hold the finished drape in place or just decorate it if you want to.

I encourage you to experiment until you find the way that is comfortable for you. I try things out the night or day before I plan to wear them if they are new looks for me. This way, if I need a supply to hold myself together, (or who knows what!) I have time to get it ready in advance.

I’ve written instructions on making your own gigantic scarf like this one on my next blog post. Check it out!
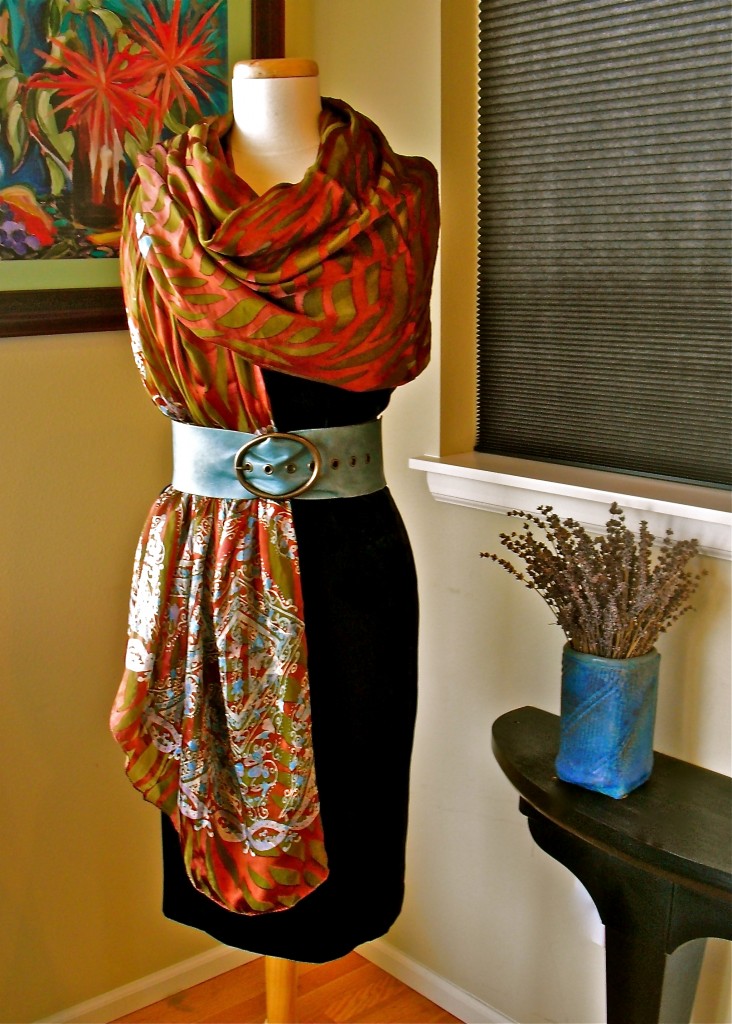
Step #5) To Finish the Beautiful "Belted Half Dress Drape" Scarf Style, Arrange the Way the Fabric Loops Around Your Neck and Adjust the Folds and Gathers in the Half Draped Skirt to Flatter Your Face and Figure and Please Yourself.
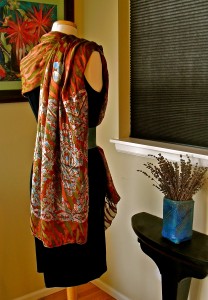
Finished Back Right Over the Shoulder Shoulder View of the "Belted Half Dress Drape" Scarf Style
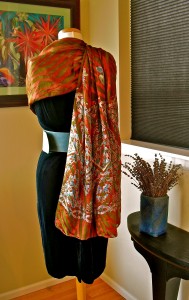
Finished Back View of "Belted Half Dress Drape" Scarf Style
Finished Right Side View of the "Belted Half Dress Drape" Scarf Style

Share