Image 01

Lady Violette

The Romantic Lifestyle

Posts Tagged ‘How To Make Your Own Designer Scarf’

Scarf Styling for Long Oblong Scarves ~ Two Ways Lady Violette Likes to Wear an Oblong Scarf ~ Simply Looped and Draped & in a Dramatic Double Side Wrap Style for a Long Scarf

Monday, April 25th, 2011

Step #1) Begin with Oblong Scarf Simply Draped -

I have a 96″ long crinkly green silk scarf with beaded fringe on both ends. Here Tricia James, International Scarf  Stylist, shows us one way she wraps and ties such a scarf It is lovely as is and can be worn in a simple elegant drape looped around the neck with both ends hanging down as shown in the first photo and Step #1 ~ You can wear the scarf simply looped just like this or begin with this drape as the first step of the dramatic double side wrap style.

With all the fancy scarf tying and embellishing experiments of late I still think the simple drapes are sometimes the most modern and sophisticated ways of wearing and showing off  beautiful scarf shapes and textiles. I like both elegantly simple and ornate ways of styling scarves and shawls. I want to wear them in different ways at different times. I like having both options and the skills for styling both of them.

This scarf is particularly long ~ eight feet long to be exact! It was given to me by someone who thought it was too long and awkward for her to handle! I was delighted to receive  it! It is silk, permanently pleated, and embellished with seed beads on both ends.

Because it is so very very long it is perfect for wrapping. Here is how to do this dramatic double wrap style ~ done the same way Tricia demonstrated on one side in the earlier post titled ~ How to Tie the Orange Pashima ~ but done on both sides to create this lovely style.

Step #2) Wrap End on Left Side Under & Around

Step #2) Begin with the Left side. All you do is wrap the end on one side under and pull it through…

Step #3) Pull it Through

Step #3) Then wrap it around again, repeating under and around and through…


Step #4) Wrap Fabric Around & Around Until You Reach the Bottom of the Front Draped Loop

Step #4) Continuing until you have wrapped the fabric around enough times to get to the bottom of your front drape loop.

Step #5) Repeat the Wrapping Process on the Right Side of the Scarf

Step #5) Repeat the exact same wrapping process on the Right side of the scarf.


Step #6) Voila! The beautiful finished Dramatic Double Side Wrap Style for an Oblong Scarf! Once again demonstrating that tying and wearing a scarf beautifully is definitely one of the foremost Feminine Arts! Thank you Tricia for demonstrating this beautiful style! You can visit Tricia James at ScarfGenie.com.

Step #6) The finished Dramatic Double Side Wrap Style for an Oblong Scarf!

Share

Lady Violette’s Dji~Dji Hand Knitted Winter Scarf of Vintage Boucle Mohair & Fine Fingering Yarn ~ A Complimentary Lady Violette Knitting Pattern!

Monday, April 18th, 2011

The Dji-Dji Scarf Designed by Lady Violette

The Dji-Dji Scarf Designed by Lady Violette

The Dji~Dji Scarf is 42" Long, but You Can Make it as Long as You Like!

I had about 2 & 1/2 balls of old vintage mohair boucle yarn called Dji~Dji in a heathery purple and grey melange. They were not complete balls and the yardage was unknown. I also had a bit of skinny grey wool yarn, fingering weight, but not enough to make a pair of socks. I wondered if I had enough to make a scarf? It was a gamble, but I decided to try it. I knit a small swatch holding the two yarns together. I used size 8 needles and they worked fine. I wanted texture, so I made up a simple pattern and knit until I ran out of yarn! I am posting this as a complimentary knitting pattern that anyone may use! Enjoy making & wearing it!

Here’s the pattern for the Dji~Dji Scarf! I used size 8US straight knitting needles.

To Make: Cast on 32 stitches.

1st & 3rd rows:(K2,P2) to end

2nd & 4th rows: (P2,K2) to end

These 4 rows form the pattern.

Repeat until you nearly run out of yarn or the scarf is the length you like. I was able to knit to 42 inches. Then cast off. C’est fini!

You can use any yarn or combination of yarns held together that will give you an approximate gauge of 4 stitches and 4 rows to an inch. You can make the scarf any length you like from about 40 inches to 96 inches! The Blackberry scarf I posted earlier is 96 inches long including the fringe if you wish to use the way it looks as a guideline. The good think about scarves is that you can easily take them off the needles and try them on to decide what length you actually like and want to make!

A Close Up Showing the Texture of the Yarn & the Pattern Stitch & the Pair of Hair Sticks Used as Shawl Pins!

I didn’t block this piece because I wanted to retain it’s lofty nature. It is a little short for tying so I simply crossed it over at the front of my neck and stuck two hairsticks in it, one above the other, to hold it closed. You can use children’s chopsticks as well. They are shorter than adult ones and make great shawl pins. I have a shawl pin that would also work just like a hair stick! I like the look of two hair sticks slightly juxtaposed one above the other. Chopsticks make great scarf pins or shawl pins which is really scarf/shawl jewelry. You can wear them in your hair too to keep it pinned up when knitting! And I encourage you to try hair accessories such as these, lobster clips, and barrettes to hold your scarves and shawls in place. Hair jewelry can often double as scarf  and shawl jewelry!

This scarf is great over a high necked sweater or tucked inside the collar of a woolen coat. The double layer of crossed over knitted wool or mohair keeps your chest cozy and warm. It’s easy to make, looks good with black or any co-ordinating color. It’s a good solution to keeping warm and looking stylish at the same time!

Depending on the color and type of yarn you use this can be used as a man’s or a woman’s scarf. It is extremely easy to knit. And the results look very professional. This would make a great first scarf pattern!

Please feel free to use and enjoy it with my compliments! If you do so please credit me and refer people to my blog. And, if you make it, please send photos and I’ll try to post them for others to view. I recently sent photos of a finished project and the link to my blog to a designer  whose sweater pattern I knit and she wrote back thanking me. It was very encouraging getting that feedback!

Share

How to Make (or buy) the Gigantic Scarf I Used for My “Belted Half Dress Drape” Long Oblong Scarf Style.

Wednesday, April 13th, 2011

I know how hard it is to find a giant scarf, or a great scarf! Especially one that is affordable or in the fabric, the color or the shape that I want. Therefore I have started making my own so that I can have whatever I need!

Gigantic Scarf 96" x 45"


This is the scarf I used to create the “Belted Half Dress Drape” scarf style demonstrated in my post yesterday. It is simply a 96″ long piece of 45″ wide fabric narrowly hemmed on each end. In this case with a rolled hem stitched by machine using a narrow hemmer foot. You can do it on a machine or by hand. The hand method is called a narrow rolled hem.

When selecting fabric something very light works best. This scarf is made of silk chiffon. It is border printed on each end because it was originally intended to be made into a scarf, but any all over print or a solid color will work just as well. Silk or polyester chiffon, china silk, lightweight silk crepe, rayon, or very lightweight cotton batiste would also be appropriate.

You will need to buy between 8 and 9 feet of fabric total. You want it to be sure the fabric is cut straight across the end before you hem it. Fabric stores do not always cut off the pieces they sell in exact straight lines with the grain of the fabric. Check for this before you sew the hem and, if necessary even it out.

Shops that sell Indian saris carry the kind of fabric I used. I have seen border prints, printed on each end like this one, or on just one end. My scarf is 96 inches long, That is 8 feet. I am 5″ 7″ tall and I found the length to be adequate. However, if I could I would get a little longer piece, such as 9″ that would give me a bit longer drape hanging down the back when I have finished the tie. If you are very tall I advise a 9 ‘ long scarf. That is all there is to it! It is quite easy and you can make your own “designer ” scarf in just the size, shape and fabric you need quite reasonably! Appropriate fabrics will cost from $3 per yard to about $40 per yard in fabric shops.

I have found chiffon on discount tables for $3 – $5 per yard. The sari silk scarf cut I used in the picture was a true bargain for $5 found in a thrift shop. They are also available in Indian shops and are not terribly expensive. I have also seen silk in fabric shops for $20 – $40 per yard. If you do not sew yourself, just purchase the fabric you like and take it to a tailor or dressmaker and ask them to hem it for you. Or ask the staff if anyone there would be willing to do it. I know that many women who work in fabric also sew for people.

Share

Lady Violette’s “Belted Half Dress Drape” ~ A New Scarf Style ~ How to Wrap It & Wear It & Transform a Dress!

Wednesday, April 13th, 2011

Necessity is the mother of invention. I needed to figure out something impressive and dramatic to wear to a midday meeting with a producer/ presenter. I needed to look creative and talented and be memorable. I wanted to look ultra feminine as well because I feel that works to my advantage. I wanted to look both business-like and artistic. I felt that sensual and attractive would work, but I did not want to look not overtly sexy. Although it is spring it is also still cold out and I needed to be warm. I find that wearing tights and  layering scarves and shawls over dresses traps air and creates a cozy layer of practical extra warmth. I cannot think and relax if I am cold! It has been in the 30’s all week. It has been wet and windy, even snowing and hailing. And it has been drafty everywhere, both inside and out. All these thoughts were at work in the back of my mind. And this was only what I had to be thinking about what I was going to wear! The other things on the agenda were on my mind as well, but I felt I had them under control. I just wanted to figure out something to wear in which I would feel comfortable and confident, and have my outfit and accessories all worked out in advance.

Browsing through the Nieman Marcus online catalogue for ideas yesterday I found an immense Oscar de la Renta scarf and a wide belt that I loved. Alas, the scarf was $850 and the belt was $395. I couldn’t buy that right now, but I was determined to have the look! So I sorted through my things to find my biggest scarf and a belt of similar width. They don’t give the size or the shape of the Nieman Marcus scarf, only the price! It looked big and it looked like a square.

Front View of the "Belted Half Dress Drape" Achieved ~ Transforms a Dress with Just One Wrap & a Wide Belt!

I don’t currently have a gigantic square, but I do have a brown and olive green gigantic oblong silk scarf that measures 45″ x 96″. It is basically an 8′ x 45″ wide piece of fabric, but it is printed with a blue and white floral design at both vertical ends like a border print, so it was designed to be a scarf, shawl. or stole. I also found that I had a blue leather belt about 3 inches wide.

The idea I had was to make what I have named a “Belted Half Dress Drape” using the gigantic oblong silk scarf  and securing it with the wide color co-ordinated belt. I wanted to transform my basic sheath dress into a cinch waist draped silk dress by using one simple to do wrap and belting it! I wanted the finished style to look like one of the very expensive European or American designer silk draped sheath dresses I have been seeing in fashion magazines and stores lately.

Thus I concocted my “Belted Half Dress Drape”  Scarf Style.
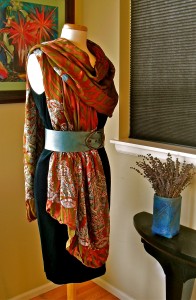
3/4 or Right Side/Front View of the "Belted Half Dress Drape"

I think it worked quite well and it was amazingly easy to do! I have taken photos from all angles so you can see that my new “Belted Half Dress Drape” scarf design actually looks nice and works as a dress from back, side and front views!

As you can see the “Belted Half Dress Drape” is beautiful from all angles.

I think wearing a scarf beautifully is one of the ultimate feminine arts!
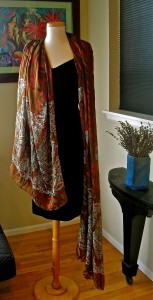
Step #1) Drape Scarf Over Shoulders, Left side Longer Than Right as Shown.


To create this sensual style all you do is:

Step #1) Drape 96″ long or longer scarf around the back of your neck and over your shoulders, Left side longer than Right as shown. Right side reaching almost to the hemline of your dress. Spread the Right side out to fan over your body from the center to the Right side seam of your dress.
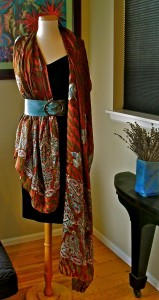
Step #2) Fasten the Belt Around Your Waist with Right Shorter Side of Scarf Underneath It & Left Longer Side Hanging Free.

Step #2) Fasten the wide belt around your waist with Right shorter side of scarf underneath it and Left longer side of scarf on the outside of belt hanging free over your Left shoulder. Arrange the folds of the scarf to your taste like a little half dress that covers the right side of your body.
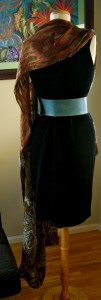
Step #3) Check the Back View in a Hand Mirror After Putting on the Belt. It Should Look Like This!

Step #3) The back will look like this! I found it helpful to look at the way things were arranged in the back in a full length mirror using a hand mirror. Be sure that only the Right front shorter side is tucked under the belt. The Left longer side should be hanging freely off to the Left side in a casual manner like this.

I experimented with the arrangement of the front folds and found that I preferred them to be uneven and arranged like a gathered skirt in the front. This was softer, prettier and more feminine than a straight across the bottom hemline. I pictured a Grecian draped effect as my goal. It may be helpful to strive for that as you arrange your folds.
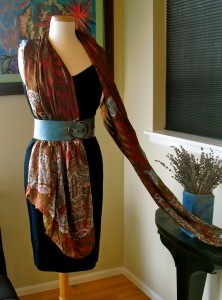
Step #4) Gather Up the Long Left Side of the Shawl and Drape it Over Your Right Shoulder!

Step #4) Finally gather up all the fabric in the long Left side of the shawl and drape it loosely and casually over your Left shoulder around your neck and over your Right shoulder letting the long drape of fabric hang down your back! You will need to arrange the drape in your own individual manner in a way that is pleasing to you.

I was able to do this on myself in about three minutes! I wore it around the house for a couple of hours and it actually stayed put and maintained the original look while I tested it out. I did not pin it in place, but you could use a brooch on the Right shoulder to hold the finished drape in place or just decorate it if you want to.

I encourage you to experiment until you find the way that is comfortable for you. I try things out the night or day before I plan to wear them if they are new looks for me. This way, if I need a supply to hold myself together, (or who knows what!) I have time to get it ready in advance.

I’ve written instructions on making your own gigantic scarf like this one on my next blog post. Check it out!
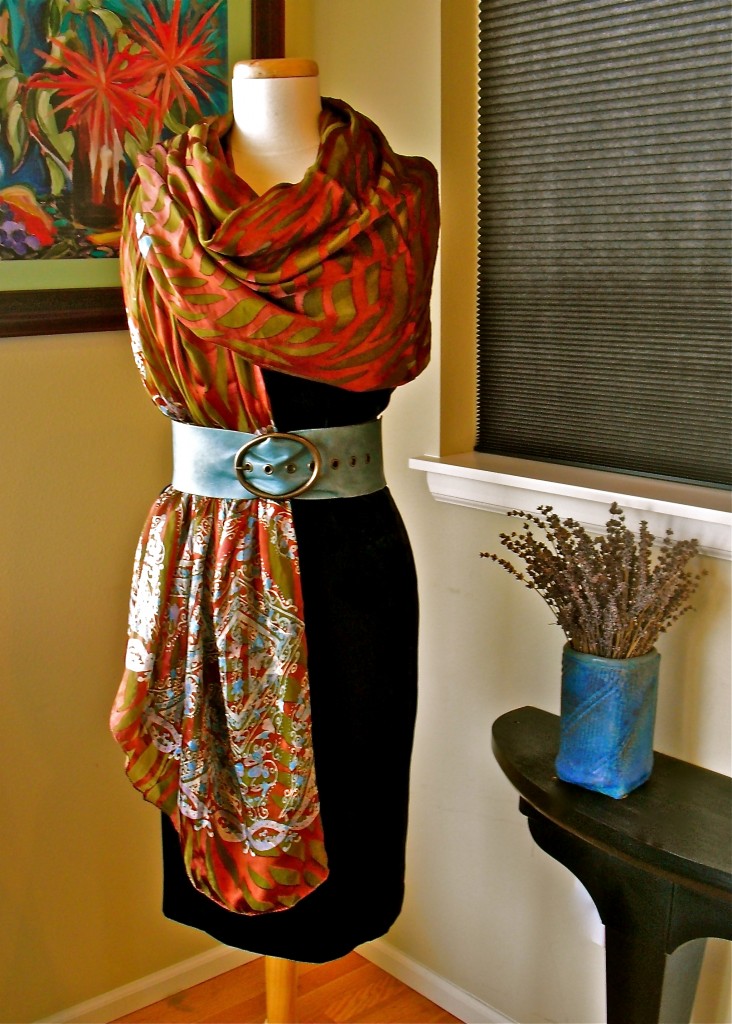
Step #5) To Finish the Beautiful "Belted Half Dress Drape" Scarf Style, Arrange the Way the Fabric Loops Around Your Neck and Adjust the Folds and Gathers in the Half Draped Skirt to Flatter Your Face and Figure and Please Yourself.
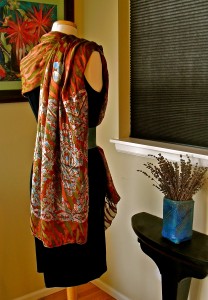
Finished Back Right Over the Shoulder Shoulder View of the "Belted Half Dress Drape" Scarf Style
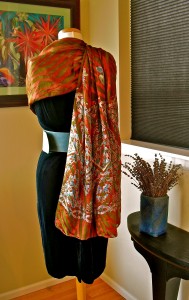
Finished Back View of "Belted Half Dress Drape" Scarf Style
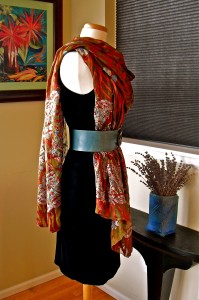
Finished Right Side View of the "Belted Half Dress Drape" Scarf Style

Share