Image 01

Lady Violette

The Romantic Lifestyle

Posts Tagged ‘How to Tie a Scarf’

Lady Violette’s Dji~Dji Hand Knitted Winter Scarf of Vintage Boucle Mohair & Fine Fingering Yarn ~ A Complimentary Lady Violette Knitting Pattern!

Monday, April 18th, 2011

The Dji-Dji Scarf Designed by Lady Violette

The Dji-Dji Scarf Designed by Lady Violette

The Dji~Dji Scarf is 42" Long, but You Can Make it as Long as You Like!

I had about 2 & 1/2 balls of old vintage mohair boucle yarn called Dji~Dji in a heathery purple and grey melange. They were not complete balls and the yardage was unknown. I also had a bit of skinny grey wool yarn, fingering weight, but not enough to make a pair of socks. I wondered if I had enough to make a scarf? It was a gamble, but I decided to try it. I knit a small swatch holding the two yarns together. I used size 8 needles and they worked fine. I wanted texture, so I made up a simple pattern and knit until I ran out of yarn! I am posting this as a complimentary knitting pattern that anyone may use! Enjoy making & wearing it!

Here’s the pattern for the Dji~Dji Scarf! I used size 8US straight knitting needles.

To Make: Cast on 32 stitches.

1st & 3rd rows:(K2,P2) to end

2nd & 4th rows: (P2,K2) to end

These 4 rows form the pattern.

Repeat until you nearly run out of yarn or the scarf is the length you like. I was able to knit to 42 inches. Then cast off. C’est fini!

You can use any yarn or combination of yarns held together that will give you an approximate gauge of 4 stitches and 4 rows to an inch. You can make the scarf any length you like from about 40 inches to 96 inches! The Blackberry scarf I posted earlier is 96 inches long including the fringe if you wish to use the way it looks as a guideline. The good think about scarves is that you can easily take them off the needles and try them on to decide what length you actually like and want to make!

A Close Up Showing the Texture of the Yarn & the Pattern Stitch & the Pair of Hair Sticks Used as Shawl Pins!

I didn’t block this piece because I wanted to retain it’s lofty nature. It is a little short for tying so I simply crossed it over at the front of my neck and stuck two hairsticks in it, one above the other, to hold it closed. You can use children’s chopsticks as well. They are shorter than adult ones and make great shawl pins. I have a shawl pin that would also work just like a hair stick! I like the look of two hair sticks slightly juxtaposed one above the other. Chopsticks make great scarf pins or shawl pins which is really scarf/shawl jewelry. You can wear them in your hair too to keep it pinned up when knitting! And I encourage you to try hair accessories such as these, lobster clips, and barrettes to hold your scarves and shawls in place. Hair jewelry can often double as scarf  and shawl jewelry!

This scarf is great over a high necked sweater or tucked inside the collar of a woolen coat. The double layer of crossed over knitted wool or mohair keeps your chest cozy and warm. It’s easy to make, looks good with black or any co-ordinating color. It’s a good solution to keeping warm and looking stylish at the same time!

Depending on the color and type of yarn you use this can be used as a man’s or a woman’s scarf. It is extremely easy to knit. And the results look very professional. This would make a great first scarf pattern!

Please feel free to use and enjoy it with my compliments! If you do so please credit me and refer people to my blog. And, if you make it, please send photos and I’ll try to post them for others to view. I recently sent photos of a finished project and the link to my blog to a designer  whose sweater pattern I knit and she wrote back thanking me. It was very encouraging getting that feedback!

Share

The Delicious Blackberry Scarf by Lady Violette ~ Making and Styling a Fabulous Extra~Long Handknitted Winter Scarf with Fringe! Made with Noro’s Yarns Using a Jane Ellison Pattern

Sunday, April 17th, 2011

The Blackberry Hand Knitted Winter Scarf of Noro Yarns

Everything about this scarf is scrumptious! The yarn, the colors, the softness, the easy to execute pattern, the design, how warm and thick it is and how finally how elegant it looks! I love the name too! I think the stitch pattern is sometimes referred to as the blackberry stitch, but the Noro book doesn’t explain that. Anyway, it was easy to make. I am often working on really difficult knitting projects in which I have to concentrate closely on every stitch and row I make. This was a good break being a repetitive easy to do and remember pattern that I could work on while talking to people, watching a film, waiting for an appointment, etc.

Because I was only knitting with two types of yarn it was also an easy to carry around project! I need to take on more like this. It is hard to lug around a basket of 50 different colors and types of yarns when I want to knit away from home. All serious knitters usually have several different kinds of projects on needles and in the works at any given time. Of late I have been finishing a lot of things and don’t have something easy that I gan grab as I leave the house and work on when I get a chance while out. It is time to set up another one.
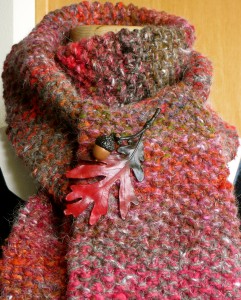
 

Close Up View of the Blackberry Stitch

The Blackberry is another pattern from the book Naturally Noro by Jane Ellison using Noro’s yarns. This is actually a booklet, rather than a book. It looks like a magazine. As far as I know these are not available from bookstores. I believe they are only sold by specialty yarn shops that also carry Noro’s yarns.

The yarns specified and the ones I actually used are Noro’s Iro in shade 9 and Noro’s Kochoran in shade 17. You work with one strand of each type, held together throughout the entire project. It is also done on giant size #13 US knitting needles so it knits up really quickly. That means instant gratification! I used Clover bamboo needles.

I have experimented with many types of needles and these are my favorites. I have found that stitches and the finished fabrics actually look very different knit on needles made of different materials. I recommend using the same type of needles made by the same company of the same material for your entire project.

I once made a pair of gloves on size 7 wooden needles. I had a pair of Clover and a pair of Brittany – both wood, both size 7. I wanted to make both gloves at the same time. I launched into the knitting. Unfortunately both gloves looked different! They were knit of the same yarn in the same technique, by the same person. The difference came from the two brands of needles made of the same type of wood. I showed them to many people at my local knit shop. They could all tell there was a pronounced difference. Caused by using two different brands of wooden needles in the same size! The one knit on Clover needles looked the smoothest. So I ripped out the other one and reknit the entire glove to match the better looking one done on the Clovers. A tough lesson learned the hard way! You don”t have to go through that because I am warning you ahead!

The Fabulous Dramatic Hand Made Yarn Fringe

This finished scarf is 96 inches long. It is mighty long and mighty thick and I love it that way! It’s very warm! Mighty warm! It also has fabulous fringe on both ends! I also love fringe! It is so dramatic! I love tossing it! This scarf is so long and big and thick that is is almost like wearing a coat! It does it’s job as a winter scarf! I also like having all the warm thickness of several layers of it cuddled up around my neck.

Noro’s yarn is hand dyed and hand spun in small batches in Japan! When they come out with a color it is usually not available very long. In fact I have had a lot of trouble actually getting enough of it in the same type and color to make entire sweaters – even size small women’s sweaters and children’s sweaters which is what I am usually making!

Noro, himself, is a painter who became a knitter and spinner. Working with his yarns is like painting. They are spectacular! To me at least. I actually like the immense amount of variation in each skein and the difficult to get enough of it aspect. I like the uneven spinning and unpredictable differences found in each small batch because It is like painting. I approach knitting with it like painting and I am willing to experiment and work with it’s unique qualities to achieve the effects I want. Incidentally these are unpredictable and they evolve as you work with the yarn. They cannot be planned in advance. There is an element of chance involved. I like that in my knitting. Even though I am a technical perfectionist! In the end, when I have finished knitting a garment out of Noro’s yarn I know I have a unique to me one of a kind piece!
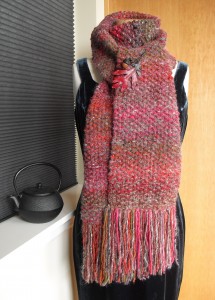
The Fabulous Blackberry Scarf Designed by Jane Ellison & Knitted by Lady Violette with Yarns by Noro

Now I am all excited and I want to go buy yarn and start another one! I am worried about what may happen to Noro yarn given the Tsunami disaster in Japan. Of course I am more worried about other things in Japan, but the Noro yarns are definitely important elements in my work! They have always been hard to get and I am concerned that their availability may be seriously impacted. I am going to investigate this.

The oak leaf pin with an acorn looks like it is made of copper, then enameled. It is a vintage piece that I found at the Goodwill! It is a perfect accent on this scarf!

People often ask me how much it costs to make something like this. The kinds of yarns I use are luxury yarns of natural fibers. In the case of Noro all the steps of production are done organically. All of them! From raising the sheep to getting the ball of yarn onto a shop’s shelf! The fibers used are the best available and often rare. Consequently, Noro’s yarns are very expensive. These are $20.25 per skein and the sweater required 6 skeins total! So the yarn cost was $121.50 before tax, The pattern book is $24 and you will also need a pair of Clover bamboo or similar wooden knitting needles in size 13US which are about $10.  Allowing for a few other miscellaneous supplies and tax the project cost comes to about $170 just for the materials.

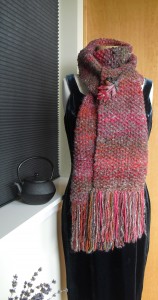
Blackberry Scarf Simply Wrapped

That is the cost to make this sweater if you knit it yourself! No allowance is figured in for the amount of time and expertise for an expert knitter to make if for you!  I am often asked why I do not sell the beautiful hand knits that I make on eBay or Etsy. It would not be worth it for me to do so. The honest truth is that people are not willing to pay what it costs to make them! Or to pay me anything for my time to make them! I have friends who knit and sell their work that way and I have watched the process. They make wonderful things but cannot charge enough to even cover the cost of using top quality yarns. I have had many discussions with fiber artists sharing their experiences selling in these venues. If they continue to do so they knit items in acrylic yarn and make only uncomplicated things that they can produce quickly. The online buying public is not willing to pay for hand knits in particular. Too few people who do not knit themselves understand what is involved and are, thus, unwilling to pay for it.

I have sold on eBay and Bonanza and I know how these systems work. It usually isn’t worth the effort involved. I have written an article about selling on eBay which I will intend post on my blog soon. I am quite willing to share what I have learned about that! I sold high end high quality vintage clothing on eBay for over a year. It was difficult and not worth the effort involved! More about that later!

The bottom line is that, if you want a really gorgeous hand knitted scarf like this one you will have to knit it yourself or find a friend who will do it for you. Or, better yet, teach you to knit! And that is a good thing as you will have the enjoyment of the knitting process for your time investment as well! Knitting is a wonderful fulfilling meditative calming, and grounding experience.

I honestly hope seeing this Blackberry scarf and the other projects I have posted inspires you to knit!

The Blackberry Scarf ~ A Wonderful Hand Knitted Winter Scarf


As far as I am concerned that is the big picture!  This is the softest, warmest winter scarf I own! The easy pattern is appropriate for a beginning knitter who knows how to knit, purl, cast on and off, and can read a basic pattern.

Scarves are worn in every culture and knitting is done all over the world. Every country has techniques and styles to contribute to the great knitting, scarf  design and styling repertoires available for us to draw from.   Interestingly the Blackberry is truly an International Scarf because the yarn is from Japan, the designer, Jane Ellison is British and it was knitted in the United States by Lady Violette! I find this crossover of influences fascinating and it adds interest to the scarf for me!

Share

How to Make (or buy) the Gigantic Scarf I Used for My “Belted Half Dress Drape” Long Oblong Scarf Style.

Wednesday, April 13th, 2011

I know how hard it is to find a giant scarf, or a great scarf! Especially one that is affordable or in the fabric, the color or the shape that I want. Therefore I have started making my own so that I can have whatever I need!

Gigantic Scarf 96" x 45"


This is the scarf I used to create the “Belted Half Dress Drape” scarf style demonstrated in my post yesterday. It is simply a 96″ long piece of 45″ wide fabric narrowly hemmed on each end. In this case with a rolled hem stitched by machine using a narrow hemmer foot. You can do it on a machine or by hand. The hand method is called a narrow rolled hem.

When selecting fabric something very light works best. This scarf is made of silk chiffon. It is border printed on each end because it was originally intended to be made into a scarf, but any all over print or a solid color will work just as well. Silk or polyester chiffon, china silk, lightweight silk crepe, rayon, or very lightweight cotton batiste would also be appropriate.

You will need to buy between 8 and 9 feet of fabric total. You want it to be sure the fabric is cut straight across the end before you hem it. Fabric stores do not always cut off the pieces they sell in exact straight lines with the grain of the fabric. Check for this before you sew the hem and, if necessary even it out.

Shops that sell Indian saris carry the kind of fabric I used. I have seen border prints, printed on each end like this one, or on just one end. My scarf is 96 inches long, That is 8 feet. I am 5″ 7″ tall and I found the length to be adequate. However, if I could I would get a little longer piece, such as 9″ that would give me a bit longer drape hanging down the back when I have finished the tie. If you are very tall I advise a 9 ‘ long scarf. That is all there is to it! It is quite easy and you can make your own “designer ” scarf in just the size, shape and fabric you need quite reasonably! Appropriate fabrics will cost from $3 per yard to about $40 per yard in fabric shops.

I have found chiffon on discount tables for $3 – $5 per yard. The sari silk scarf cut I used in the picture was a true bargain for $5 found in a thrift shop. They are also available in Indian shops and are not terribly expensive. I have also seen silk in fabric shops for $20 – $40 per yard. If you do not sew yourself, just purchase the fabric you like and take it to a tailor or dressmaker and ask them to hem it for you. Or ask the staff if anyone there would be willing to do it. I know that many women who work in fabric also sew for people.

Share

Lady Violette’s “Belted Half Dress Drape” ~ A New Scarf Style ~ How to Wrap It & Wear It & Transform a Dress!

Wednesday, April 13th, 2011

Necessity is the mother of invention. I needed to figure out something impressive and dramatic to wear to a midday meeting with a producer/ presenter. I needed to look creative and talented and be memorable. I wanted to look ultra feminine as well because I feel that works to my advantage. I wanted to look both business-like and artistic. I felt that sensual and attractive would work, but I did not want to look not overtly sexy. Although it is spring it is also still cold out and I needed to be warm. I find that wearing tights and  layering scarves and shawls over dresses traps air and creates a cozy layer of practical extra warmth. I cannot think and relax if I am cold! It has been in the 30’s all week. It has been wet and windy, even snowing and hailing. And it has been drafty everywhere, both inside and out. All these thoughts were at work in the back of my mind. And this was only what I had to be thinking about what I was going to wear! The other things on the agenda were on my mind as well, but I felt I had them under control. I just wanted to figure out something to wear in which I would feel comfortable and confident, and have my outfit and accessories all worked out in advance.

Browsing through the Nieman Marcus online catalogue for ideas yesterday I found an immense Oscar de la Renta scarf and a wide belt that I loved. Alas, the scarf was $850 and the belt was $395. I couldn’t buy that right now, but I was determined to have the look! So I sorted through my things to find my biggest scarf and a belt of similar width. They don’t give the size or the shape of the Nieman Marcus scarf, only the price! It looked big and it looked like a square.

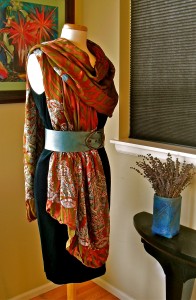
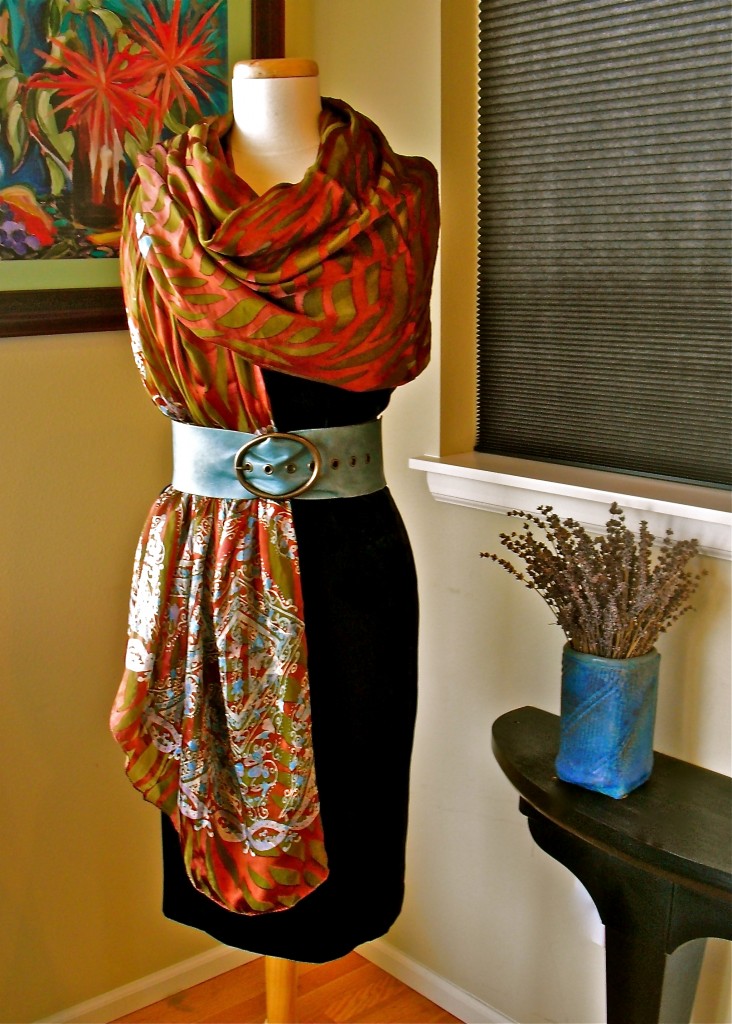
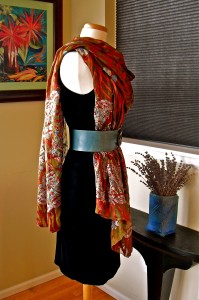
Front View of the "Belted Half Dress Drape" Achieved ~ Transforms a Dress with Just One Wrap & a Wide Belt!

I don’t currently have a gigantic square, but I do have a brown and olive green gigantic oblong silk scarf that measures 45″ x 96″. It is basically an 8′ x 45″ wide piece of fabric, but it is printed with a blue and white floral design at both vertical ends like a border print, so it was designed to be a scarf, shawl. or stole. I also found that I had a blue leather belt about 3 inches wide.

The idea I had was to make what I have named a “Belted Half Dress Drape” using the gigantic oblong silk scarf  and securing it with the wide color co-ordinated belt. I wanted to transform my basic sheath dress into a cinch waist draped silk dress by using one simple to do wrap and belting it! I wanted the finished style to look like one of the very expensive European or American designer silk draped sheath dresses I have been seeing in fashion magazines and stores lately.

Thus I concocted my “Belted Half Dress Drape”  Scarf Style.

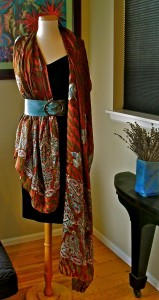
3/4 or Right Side/Front View of the "Belted Half Dress Drape"

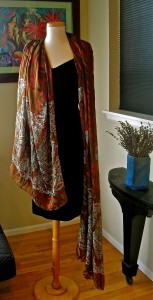
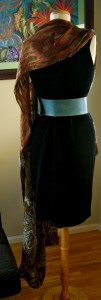
I think it worked quite well and it was amazingly easy to do! I have taken photos from all angles so you can see that my new “Belted Half Dress Drape” scarf design actually looks nice and works as a dress from back, side and front views!

As you can see the “Belted Half Dress Drape” is beautiful from all angles.

I think wearing a scarf beautifully is one of the ultimate feminine arts!

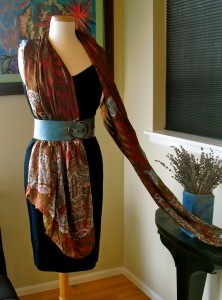
Step #1) Drape Scarf Over Shoulders, Left side Longer Than Right as Shown.


To create this sensual style all you do is:

Step #1) Drape 96″ long or longer scarf around the back of your neck and over your shoulders, Left side longer than Right as shown. Right side reaching almost to the hemline of your dress. Spread the Right side out to fan over your body from the center to the Right side seam of your dress.

Step #2) Fasten the Belt Around Your Waist with Right Shorter Side of Scarf Underneath It & Left Longer Side Hanging Free.

Step #2) Fasten the wide belt around your waist with Right shorter side of scarf underneath it and Left longer side of scarf on the outside of belt hanging free over your Left shoulder. Arrange the folds of the scarf to your taste like a little half dress that covers the right side of your body.

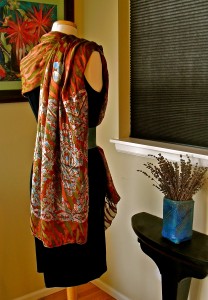
Step #3) Check the Back View in a Hand Mirror After Putting on the Belt. It Should Look Like This!

Step #3) The back will look like this! I found it helpful to look at the way things were arranged in the back in a full length mirror using a hand mirror. Be sure that only the Right front shorter side is tucked under the belt. The Left longer side should be hanging freely off to the Left side in a casual manner like this.

I experimented with the arrangement of the front folds and found that I preferred them to be uneven and arranged like a gathered skirt in the front. This was softer, prettier and more feminine than a straight across the bottom hemline. I pictured a Grecian draped effect as my goal. It may be helpful to strive for that as you arrange your folds.

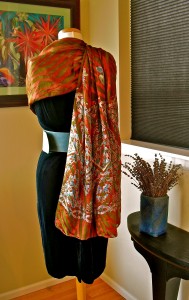
Step #4) Gather Up the Long Left Side of the Shawl and Drape it Over Your Right Shoulder!

Step #4) Finally gather up all the fabric in the long Left side of the shawl and drape it loosely and casually over your Left shoulder around your neck and over your Right shoulder letting the long drape of fabric hang down your back! You will need to arrange the drape in your own individual manner in a way that is pleasing to you.

I was able to do this on myself in about three minutes! I wore it around the house for a couple of hours and it actually stayed put and maintained the original look while I tested it out. I did not pin it in place, but you could use a brooch on the Right shoulder to hold the finished drape in place or just decorate it if you want to.

I encourage you to experiment until you find the way that is comfortable for you. I try things out the night or day before I plan to wear them if they are new looks for me. This way, if I need a supply to hold myself together, (or who knows what!) I have time to get it ready in advance.

I’ve written instructions on making your own gigantic scarf like this one on my next blog post. Check it out!

Step #5) To Finish the Beautiful "Belted Half Dress Drape" Scarf Style, Arrange the Way the Fabric Loops Around Your Neck and Adjust the Folds and Gathers in the Half Draped Skirt to Flatter Your Face and Figure and Please Yourself.

Finished Back Right Over the Shoulder Shoulder View of the "Belted Half Dress Drape" Scarf Style

Finished Back View of "Belted Half Dress Drape" Scarf Style

Finished Right Side View of the "Belted Half Dress Drape" Scarf Style

Share

International Scarf Styling ~ a Simply Beautiful Cherry Blossom Pink Japanese Shibori Scarf Tied as a Wide Sash and Worn with Hand Made Bead Necklaces Designed by Lady Violette de Courcy

Sunday, April 10th, 2011

Japanese Cherry Blossom Pink Pleated Shibori Scarf Tied as a Sash

Shibori is an ancient Japanese method of dying and pleating. The beautiful pink pleated oblong Shibori scarf that I have simply tied around my mannequin’s waist as a sash reminds me of pink Japanese cherry blossoms.

It is cherry blossom time in Seattle where I live. The cherry trees are just beginning to bloom, but it has also been unseasonably cold and we have had several heavy periods of freezing hail and snow over the last few days! Temperatures have been in the low 30’s and accompanied by strong winds.

The University of Washington Campus has a well known large planting of Japanese cherry trees that burst into a flurry of extraordinarily beautiful lovely smelling pink blooms at the beginning of April every year. I make sure I go there every spring when they are in the height of bloom to walk under them and experience their color and enjoy their exquisite perfume. Nothing is more beautifully scented than the Japanese cherry blossom trees in full bloom. The exquisite perfume from these flowers lasts only one day, then the blossoms fall from the trees in swirls of pink snow petals and are blown away by the turbulent spring winds.

Getting caught in pelting rain and wind and a blizzard of the pink petals is all part of the memorable experience of walking under them and enjoying them. I am always a little upset by the fact that the weather is destroying them so quickly when they last such a short time anyway! I would like this transient experience to last as long as possible! So I do things to remind of it, to stretch it out a little and enjoy the memories of it longer. One thing I do is wear my pink Japanese Shibori scarf, either tied around my waist as a sash, as illustrated in the photo, or simply wrapped around my neck. It is an easy scarf to wear because it is a permanently pleated oblong. I wish I had a cherry blossom perfume to wear!

I love the scent. I’ve always  fantasized about creating a perfume from Japanese cherry blossoms. Even to the point of experimenting with making it and, about 15 years ago, talking to a professional perfumer, called a Nose, from Italy, who creates perfumes for major European couture houses. He told me it cannot be done because the flowers are only at the height of their scent for less than 24 hours each year! It is then, and only then, that hundreds of thousands of pounds of the flowers would have to be collected and their essence extracted to create a perfume. From these thousands of pounds you might get an ounce of the essence necessary to make real cherry blossom perfume. It would take impossibly vast orchards of the trees to grow enough flowers. And that is not the only problem!  The fact that the height of bloom and scent is such a short period that harvesting enough of them at exactly the right moment and processing them quickly enough to extract their pure essence is impossibly difficult.

The Italian Nose told me that many kings and emperors and professional perfumers have shared my dream. And that, over the centuries much experimenting has been done to extract the elusive essence of the pink Japanese cherry blossoms. No one has been able to succeed because it is logistically impossible and impossibly expensive. “What about a synthetic recreation of the scent?” I asked. Some of the world’s greatest perfumes, notably Channel #5 are synthetic creations. He said their have been many many attempts to do this but so far no one has succeeded. He gave me samples of several expensive perfumes that claim to have recreated the scent. They were pleasant but did not succeed.

Over the years I have tried out every perfume on the international market that claims to be the scent of Japanese cherry blossoms. I believe he is right. None of them manage to recreate the beauty of the original! Not even for a fleeting moment of delightful memorable scent. One of the great allures of perfume is its ability to recreate memories ~ memories of the person who wore it, or the place and time you wore it or an experience you had when wearing it. These supposed cherry blossom perfumes did none of that for me. I am quite a good Nose myself and know that many other perfumes are successful in that respect.

Cherry Blossom Inspired Bead Necklaces by Lady Violette de Courcy

I have had to be satisfied with creating and collecting other things that remind me of the cherry blossoms when they are not blooming. To this end I have made the necklaces of pink beads in the picture. I call them my Cherry Blossom Collection. They consist of lamp work beads I have made myself and vintage and antique beads made of all kinds of different materials that happen to be the right color of pink or, when combined together suggest Japanese cherry blossoms to me. These beads come from all over the world and have taken me many years to collect. The necklaces are one of a kind art pieces ~ no two alike and unrepeatable. In that way, too, they are like the scent of the  Japanese cherry blossoms ~ impossible to capture and reproduce ~ rare, elusive and special ~ totally unique.

I have also discovered, one night in a Japanese restaurant, that the taste of plum wine actually reminded me of the Japanese cherry blossom. Quite unexpectedly I tasted it and had a memory flash of walking under the pink trees in full bloom. I concentrated on the plum wine. I realized it has no scent, only a taste. But the taste reminds me of how the cherry blossoms smell! In that way it is very pleasurable. However, because it doesn’t have any scent at all there is no possibility of my using it as a perfume to trigger an association of the Japanese cherry blossoms scent in other people!

So far I have resigned myself to having to use the visual sense to trigger memories of cherry blossoms. Sometimes, when appropriate, I can also serve plum wine! I will continue to search for a rendition of cherry blossom perfume that satisfies me. In the meantime I will wear the Japanese cherry blossom pink accessories that I associate pleasurably with this experience ~ my pink Shibori scarf and the pretty pink necklaces and earrings I have designed.

I have some clothing designs inspired by Japanese cherry blossom forming in the back of my mind as well! And I feel that the two concert performance dresses I have made for Princess Wow! in myriad pinks are associated with this imagery. I have just finished these dresses and will be putting up final photos of them soon.

Isn’t it amazing to think about what image and association triggers an artist or designer’s imagination and leads to the creation of art in other forms? I know flowers have always stimulated fashion designers. A few posts back I quoted Christian Dior saying, “I have made flower women.” when interviewed about his New Look Collection after WW II. He also loved lilies of the valley and talked about their scent reminding him of his childhood and his mother because they were her favorite flowers. A perfect example of a perfume triggering memories! Of course he created a perfume featuring lily of the valley!

I am lucky, being Lady Violette de Courcy, that my personal flower is the violet and that both it’s flower and it’s leaf have distinct and lovely scents that are extractable for use in the making perfumes. I have several perfumes containing one, the other, or both that are very attractive and easily obtainable. I will write more about perfumes later!

Share